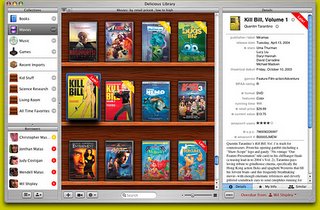
 If you are a book-lover (or a DVD collector) like me, you would no doubt have a huge collection of books. The problem that most people encounter is how to really organize their collections. People in the early days use spreadsheets to keep track of what titles they have, but doing so is really a hassle as you have to key in all the data yourself.
 Recently I came across a very cool cataloguing application that prompted me to revisit my desire to organize my home library again. And so, in this article I am going to walk you through the Delicious Library application ($39.95) from Delicious Monster (http://www.delicious-monster.com/). Delicious Library is a Mac OS X application that catalogues your personal collection of books, DVDs, CDs, and games. It does so by scanning the barcode of the item and then access the Amazon.com web service to fetch the detail information of the item.
Barcoding Scanning using your iSight or Webcam
The first thing that the Delicious Library really impresses me was its ability to scan in barcodes using your iSight camera. However, if you do not have an iSight camera, fret not. You can still use your Webcam to scan in barcodes. You would however need to do some work to get your Webcam to work in Mac OS X (refer to my earlier article at http://www.macdevcenter.com/pub/a/mac/2003/12/23/usb_webcam.html on how to do this).
Once Delicious Library is installed, click on the Video Barcode Scanner button (see Figure 1) located at the bottom of the screen to start scanning your items!

Figure 1. Click on the Video Barcode Scanner to start scanning your item
The first time you try to scan in a barcode requires some effort. For me, I placed the Webcam on the desk and held the item upright (in this case a book; see Figure 2). The trick to getting the book scanned is to do this in a brightly lit place and make sure that you keep your book still in order for the barcode to be captured successfully.
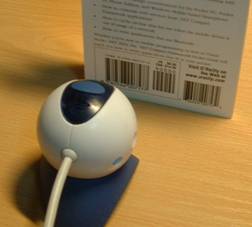
Figure 2. Scanning a barcode using the webcam
Ensure that your barcode is crossed by at least one of the red lines (see Figure 3). If you hear a beep sound, then the barcode is scanned successfully.

Figure 3. Scanning a barcode
Once the barcode is scanned, the Delicious Library will query the Amazon.com web service for the details of the item. As the querying may take some time, you can continue scanning other items while it is waiting for the result of the last query (see Figure 4).
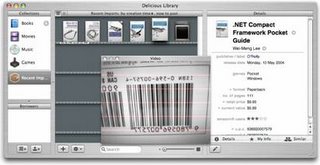
Figure 4. Fetching the information of an item from Amazon.com
Overall, I find the scanning very fun once you mastered the scanning process. However, there are at times where I had difficulty in scanning some books. If you do not have an iSight or a Webcam, I suggest you buy the Flic Bluetooth-enabled Scanner (see Figure 5) from Delicious Monster at a cost of $174.95 (when buying together with the Delicious Library license, which I think is a very reasonable price for a Bluetooth scanner). The best thing about using this scanner is that you can scan your books by going to them, rather than bringing all the books to the desk. This is especially useful if you have a large library and removing them from the shelves is too cumbersome. What’s more, even if you wandered beyond the 10 meters radius imposed by Bluetooth technology, the scanner has built-in memory enough to capture 500 barcodes which you can import into the Delicious Library when you are back to your desk.

Figure 5. Using the Flic scanner together with Delicious Library
Besides scanning, you can also enter items the traditional way using the keyboard. Click on the Add a new item button at the bottom of the screen (see Figure 6) to add a new item.
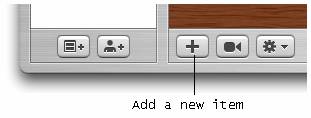
Figure 6. Adding a new item to your library
There are four methods for you to enter a new item (see Figure 7):
- Search from Amazon.com
- Enter the barcode of an item
- Manually enter the item info
- Scan using an iSight camera or Webcam

Figure 7. Various ways of adding an item
Searching for an item in Amazon.com is an easy way for you to add items to Delicious Library. Simply enter the title or/and author you want to search for and click on the Find by Title button located to its right (see Figure 8). When the result is returned, simply click on the “+” icon to add it to Delicious Library.
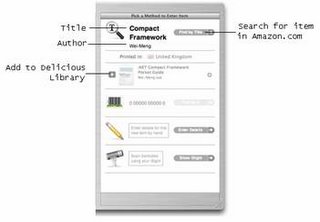
Figure 8. Searching for an item from Amazon.com
Once the items are scanned/entered, you can sort them according to a wide range of categories (see Figure 9). By default, the items are sorted by creator (e.g. authors).
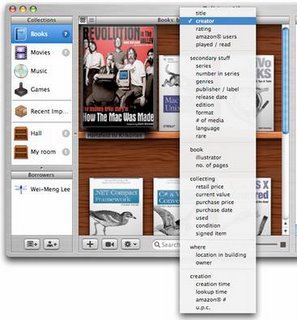
Figure 9. Sorting the items according to category
What made Delicious Library stand out from other application in the same genre is its amazing graphics effect. The cover image downloaded from Amazon.com is rendered to give it a realistic look, just like your real books (or DVDs) on the shelves. The Delicious Library can display your items (see Figure 10, 11 and 12) in a variety of sizes. The rendering of a DVD cover is most impressive (see Figure 12).

Figure 10. Displaying in the smallest size
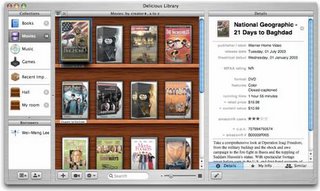
Figure 11. Displaying in small size

Figure 12. Displaying in the largest size
My only gripe with Delicious Library is that book covers are not displayed in the correct proportions. For example, the dimension of the book “Revolutions in the Valley” is 7.9x8, but Delicious Library displays it in the conventional rectangular format (see Figure 13), causing the image to be distorted. Also, sizes of all the books seem to be the same, which is definitely not the case in the real world. However, DVD does not face this problem as most DVDs are packaged in the same dimension.
You can also create virtual shelves that allow you to organize the location of your items. This is useful if you store your items in many different places, such as your study room, kitchen, etc.
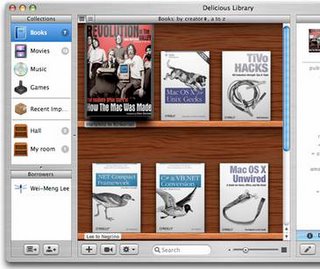
Figure 13. All the books are of the same size (the currently selected one is enlarged)
When you double-click on an item, you view an enlarged copy of its cover and on the right side of the window, there are three separate tabs:
- Details – shows the detailed information of the selected item (see Figure 14).
- My Info – allows you to enter your own comments pertaining to the selected item
- Similar –explores other similar items from Amazon.com. You can purchase related items by clicking on the shopping cart icons next to each item (see Figure 15).

Figure 14. Viewing the details of a book
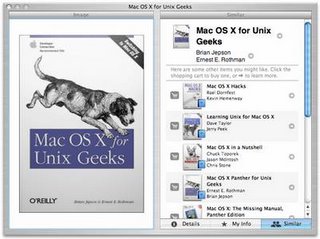
Figure 15. Viewing similar items
Another cool feature of the Delicious Library allows you to track borrower’s information. It integrates with Address Book to obtain user information. To indicate that an item is borrowed by a person, simply drag and drop the item onto the person’s name (see Figure 16). You can indicate the return date of the item by selecting the date on the right of the window (by default it is one week duration).

Figure 16. Tracking borrower’s information
When an item is overdue, it will be indicated on the book with a red stripe over the item (see Figure 17).

Figure 17. Late items are flagged
Final Thoughts
Overall, I like Delicious Library very much. It makes cataloguing your books and other collections such a fun thing to do. But what really makes the Delicious Library stand out is its innovative use of iSight (or Webcam) for barcode scanning, and its cool use of graphics really adds to the pleasure of using this application. Enough of this, I got to go and scan the rest of my library now!
No comments:
Post a Comment