Monday, September 11, 2006

Voice and Sound Recording on your iPod

Have you ever wanted to use your iPod for voice recording but were unwilling to shell out the extra cash for a third-party voice recorder? Well, in this article I am going to show you how you can turn your iPod into a recorder without needing to spend a dime. But it does require some work on your part (very minimal work, I assure you).

Apple’s firmware for the iPod does not come with any recording capability (unless you buy a third-party recorder). However that does not mean that you are stuck with this limitation forever. If you are limited by Apple’s firmware for the iPod, change it!

Recently I came across the iPodLinux project (
http://www.ipodlinux.org/Main_Page), an open source venture dedicated to porting Linux to the iPod. The iPodLinux project uses uClinux (http://www.uclinux.org/), a special variant of the Linux kernel that does not require a MMU (a memory management unit).

The cool thing about iPodLinux is that many additional applications have been written to run on the iPod, adding many capabilities not found in Apple's firmware. The iPodLinux replaces the UI of the iPod with 'podzilla' (
http://www.ipodlinux.org/Podzilla
), the default user interface for iPodLinux.

In this article, I will show you how to install iPodLinux onto your iPod and how you can use it to do voice and sound recordings. Note that iPodLinux is currently only supported on 1st, 2nd, and 3rd generation iPods. Fourth generation iPods (includes iPod Mini, U2, iPod Photo, and iPod Shuffle) support are upcoming, but not available at the moment.

Installation
You can download the various installers of iPodLinux for the different platforms – Linux, Windows, and Mac, from
http://www.ipodlinux.org/Installation.

For my case, I downloaded the Mac-version of the installer and Figure 1 shows the installer after the installer package was expanded.
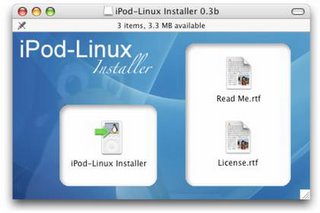
Figure 1. The iPodLinux installer

Before you actually start, you need to ensure that you have enabled your iPod for disk use. This can be enabled in iTunes->Preferences…->iPod (see Figure 2; check the Enable disk use check box).
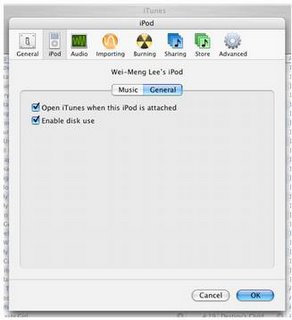
Figure 2. Enabling your iPod for disk use

Launch the iPodLinux Installer and select the iPod that is connected to your Mac (see Figure 3).
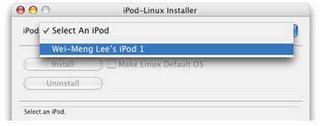
Figure 3. Selecting the iPod to install iPodLinux

To install iPod Linux onto your iPod, click the Install button (see Figure 4). Once installed, you have a choice to boot using iPodLinux, or the original iPod firmware (boots by default). If you want to boot iPodLinux by default, check the Make Linux Default OS checkbox.
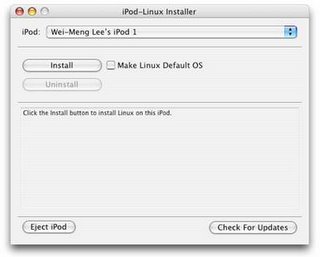
Figure 4. Installing iPodLinux

If the iPodLinux Installer complains that it is unable to install iPodLinux onto your iPod because of some unrecognized format error, you can solve this problem by “reformatting” your iPod using the iPod Updater (from Apple). However, be aware that when you use the iPod Updater, you are essentially destroying whatever content (and songs) you have on your iPod. Thus, remember to backup your iPod before you proceed. The iPod Updater can be downloaded from:
http://www.apple.com/ipod/download/. You can then use the iPod Updater to restore your iPod to the original factory setting by clicking on the Restore button (see Figure 5).
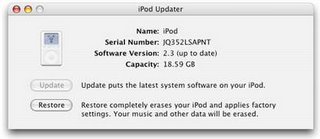
Figure 5. Restoring an iPod to its factory settings

You can now return to the iPodLinux Installer to install iPod Linux onto your iPod. When it is done, you should see the screen as shown in Figure 6 (note that my iPod’s name has been changed after a restore operation).
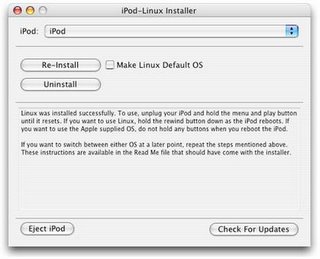
Figure 6. Successfully installing iPodLinux

To boot into iPodLinux, press and hold the Menu and Play buttons (1) at the same time and when the iPod is rebooting, press and hold the rewind button (2). Figure 7 shows the buttons combination.
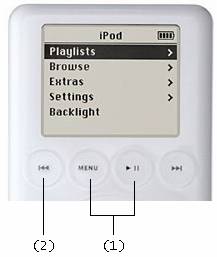
Figure 7. Buttons combinations for booting into iPodLinux

You should now see the Penguin logo on your iPod (see Figure 8), confirming that iPodLinux is installed successfully on your iPod.
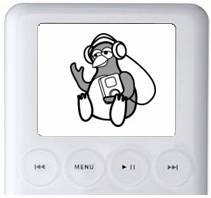
Figure 8. iPodLinux booting

You will also see the familiar command line (for those Linux users), as shown in Figure 9.
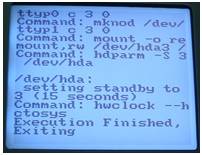
Figure 9. The command line interface of iPodLinux

You should now see podzilla on the opening screen (see Figure 10). The UI looks very similar to Apple’s UI, but with some new functionalities beneath the menu.
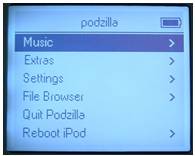
Figure 10. Podzilla

Voice Recording
Recording is one feature that is sorely missing in iPod (unless you buy third-party accessories such as the iTalk). Using the iPodLinux, you can go to the recording feature by navigating to Extras->Recordings (see Figure 11).
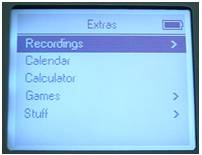
Figure 11. The Extras menu

You have two choices for recording – Mic Record (for use with a microphone) and Line In Record (for use with sound sources such as the audio-out port on your Mac). You can also select the sample rates – 8 kHz, 32 kHz, 44.1 kHz, 88.2 kHz, and 96 kHz (see Figure 12).
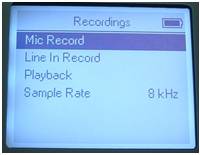
Figure 12. The Recordings menu

To record voice, you can connect an external microphone to the iPod headphones port and use the Mic Record option. Alternatively, if you do not have an external microphone, you can use your iPod earphones. Yes, this is not a typo; your earphones can be used as a microphone! My experimentation tells me that the left earphone record sounds much clearer than the right earphone. Try it on your own earphones and see if it works!

Once the voice is recorded, you can press the Menu button to return to the Recordings menu and select Playback to hear what you have just recorded. The recording is saved as a .wav file and the latest recording is listed at the bottom. Select the one you want to listen to and press the Action button (see Figure 13).
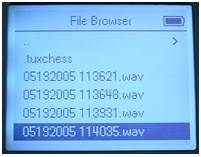
Figure 13. Playing back recorded sound

Transferring Songs from iPod to iPod
Besides recording voice, you can also transfer songs from one iPod to another. I tried playing a song on my iPod photo and then use a connector cable to connect it to my iPod (see Figure 14). The iPod records the song using the Mic Record method (the Line In Record method does not work). However the quality of the recording wasn’t that great – there was some hissing noise.
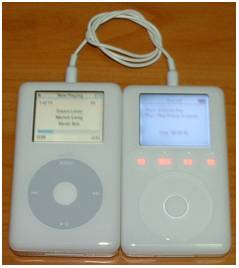
Figure 14. Transferring a song from iPod photo to iPod

However, you need to be aware of the legal issues when you are transferring songs using this method. You are essentially copying songs and so you need to ensure that you have the rights to do so.

Recording Radio to iPod
Another cool use of the recording feature of iPodLinux is for recording radio programmes. You can connect your iPod to the radio’s line-out port and then use the Line In Record method to record the radio programme. Besides the radio, recording directly from your Mac is another possibility. I tried playing a song in iTunes and then use my iPod to record through the line-out connector (again, you need to be aware of the legalities of doing this). The sound quality is pretty good and clear.

Summary
I hope you have a lot of fun using iPodLinux. Be sure to explore the other aspects of iPodLinux, such as games, and other cool applications located in the Extras menu. Have fun!

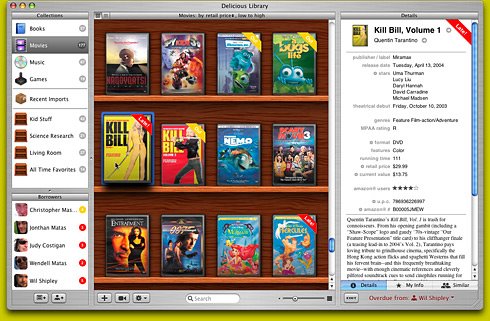
Review: Delicious Library for Mac OS X

If you are a book-lover (or a DVD collector) like me, you would no doubt have a huge collection of books. The problem that most people encounter is how to really organize their collections. People in the early days use spreadsheets to keep track of what titles they have, but doing so is really a hassle as you have to key in all the data yourself.

Recently I came across a very cool cataloguing application that prompted me to revisit my desire to organize my home library again. And so, in this article I am going to walk you through the Delicious Library application ($39.95) from Delicious Monster (http://www.delicious-monster.com/). Delicious Library is a Mac OS X application that catalogues your personal collection of books, DVDs, CDs, and games. It does so by scanning the barcode of the item and then access the Amazon.com web service to fetch the detail information of the item.

Barcoding Scanning using your iSight or Webcam

The first thing that the Delicious Library really impresses me was its ability to scan in barcodes using your iSight camera. However, if you do not have an iSight camera, fret not. You can still use your Webcam to scan in barcodes. You would however need to do some work to get your Webcam to work in Mac OS X (refer to my earlier article at http://www.macdevcenter.com/pub/a/mac/2003/12/23/usb_webcam.html on how to do this).

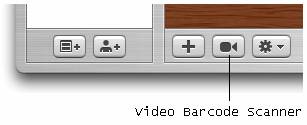
Once Delicious Library is installed, click on the Video Barcode Scanner button (see Figure 1) located at the bottom of the screen to start scanning your items!

Figure 1. Click on the Video Barcode Scanner to start scanning your item

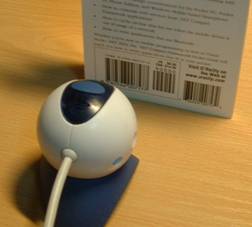
The first time you try to scan in a barcode requires some effort. For me, I placed the Webcam on the desk and held the item upright (in this case a book; see Figure 2). The trick to getting the book scanned is to do this in a brightly lit place and make sure that you keep your book still in order for the barcode to be captured successfully.

Figure 2. Scanning a barcode using the webcam

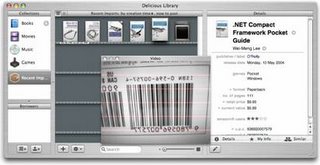
Ensure that your barcode is crossed by at least one of the red lines (see Figure 3). If you hear a beep sound, then the barcode is scanned successfully.

Figure 3. Scanning a barcode

Once the barcode is scanned, the Delicious Library will query the Amazon.com web service for the details of the item. As the querying may take some time, you can continue scanning other items while it is waiting for the result of the last query (see Figure 4).

Figure 4. Fetching the information of an item from Amazon.com

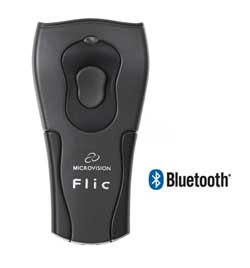
Overall, I find the scanning very fun once you mastered the scanning process. However, there are at times where I had difficulty in scanning some books. If you do not have an iSight or a Webcam, I suggest you buy the Flic Bluetooth-enabled Scanner (see Figure 5) from Delicious Monster at a cost of $174.95 (when buying together with the Delicious Library license, which I think is a very reasonable price for a Bluetooth scanner). The best thing about using this scanner is that you can scan your books by going to them, rather than bringing all the books to the desk. This is especially useful if you have a large library and removing them from the shelves is too cumbersome. What’s more, even if you wandered beyond the 10 meters radius imposed by Bluetooth technology, the scanner has built-in memory enough to capture 500 barcodes which you can import into the Delicious Library when you are back to your desk.

Figure 5. Using the Flic scanner together with Delicious Library

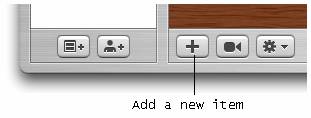
Besides scanning, you can also enter items the traditional way using the keyboard. Click on the Add a new item button at the bottom of the screen (see Figure 6) to add a new item.

Figure 6. Adding a new item to your library

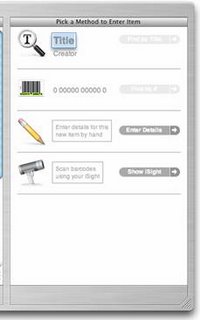
There are four methods for you to enter a new item (see Figure 7):

  • Search from Amazon.com
  • Enter the barcode of an item
  • Manually enter the item info
  • Scan using an iSight camera or Webcam

Figure 7. Various ways of adding an item

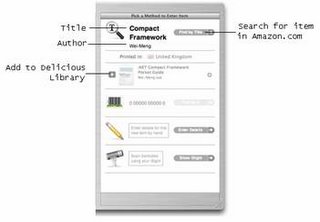
Searching for an item in Amazon.com is an easy way for you to add items to Delicious Library. Simply enter the title or/and author you want to search for and click on the Find by Title button located to its right (see Figure 8). When the result is returned, simply click on the “+” icon to add it to Delicious Library.

Figure 8. Searching for an item from Amazon.com

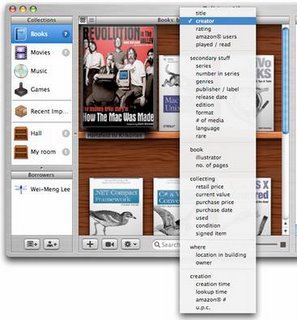
Once the items are scanned/entered, you can sort them according to a wide range of categories (see Figure 9). By default, the items are sorted by creator (e.g. authors).

Figure 9. Sorting the items according to category

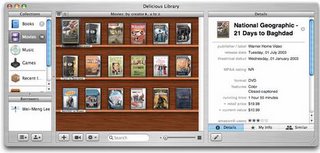
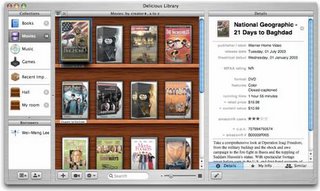
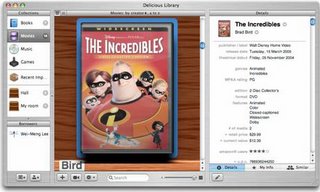
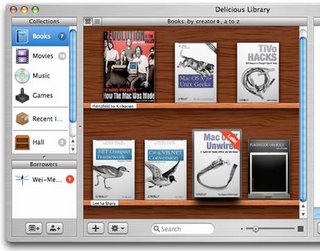
What made Delicious Library stand out from other application in the same genre is its amazing graphics effect. The cover image downloaded from Amazon.com is rendered to give it a realistic look, just like your real books (or DVDs) on the shelves. The Delicious Library can display your items (see Figure 10, 11 and 12) in a variety of sizes. The rendering of a DVD cover is most impressive (see Figure 12).

Figure 10. Displaying in the smallest size

Figure 11. Displaying in small size

Figure 12. Displaying in the largest size

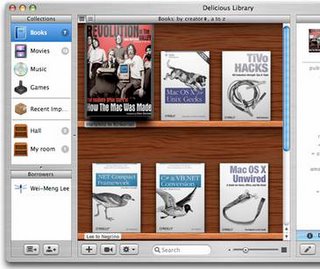
My only gripe with Delicious Library is that book covers are not displayed in the correct proportions. For example, the dimension of the book “Revolutions in the Valley” is 7.9x8, but Delicious Library displays it in the conventional rectangular format (see Figure 13), causing the image to be distorted. Also, sizes of all the books seem to be the same, which is definitely not the case in the real world. However, DVD does not face this problem as most DVDs are packaged in the same dimension.

You can also create virtual shelves that allow you to organize the location of your items. This is useful if you store your items in many different places, such as your study room, kitchen, etc.

Figure 13. All the books are of the same size (the currently selected one is enlarged)

When you double-click on an item, you view an enlarged copy of its cover and on the right side of the window, there are three separate tabs:

  • Details – shows the detailed information of the selected item (see Figure 14).
  • My Info – allows you to enter your own comments pertaining to the selected item
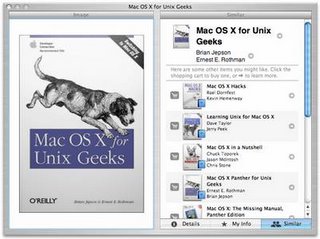
  • Similar –explores other similar items from Amazon.com. You can purchase related items by clicking on the shopping cart icons next to each item (see Figure 15).

Figure 14. Viewing the details of a book

Figure 15. Viewing similar items

Another cool feature of the Delicious Library allows you to track borrower’s information. It integrates with Address Book to obtain user information. To indicate that an item is borrowed by a person, simply drag and drop the item onto the person’s name (see Figure 16). You can indicate the return date of the item by selecting the date on the right of the window (by default it is one week duration).

Figure 16. Tracking borrower’s information

When an item is overdue, it will be indicated on the book with a red stripe over the item (see Figure 17).

Figure 17. Late items are flagged

Final Thoughts

Overall, I like Delicious Library very much. It makes cataloguing your books and other collections such a fun thing to do. But what really makes the Delicious Library stand out is its innovative use of iSight (or Webcam) for barcode scanning, and its cool use of graphics really adds to the pleasure of using this application. Enough of this, I got to go and scan the rest of my library now!

Wednesday, September 06, 2006

Turn Your PC Into a Motion Sensing Security Device with .NET

In my inaugural article on how to integrate your .NET applications with external devices, I showed how to display system information using an LCD display. In this article, I will dive into the world of sensors. Sensors are interesting devices because they are the "eyes and ears" of your computer and can provide detailed information about the surroundings, such as temperature, lighting detection, proximity measurement, and so on.

Getting Started with Atlas (Short Cuts) Released!

My newest "eBook" - Getting Started with Atlas, has just been released by O'Reilly. Here is the synopsis:

"ASP.NET "Atlas" is a new developer framework from Microsoft that simplifies the task of building more interactive web pages by drawing on the power of the Ajax technologies found in most modern browsers. Because of its tight integration with ASP.NET 2.0, Atlas will be of particular interest to Microsoft web developers.
In this Short Cut, Microsoft MVP Wei-Meng Lee introduces you to Atlas by showing ten ways you can use the technology to improve the user experience of your existing ASP.NET 2.0 apps. There's no better way to get acquainted with Atlas than by diving into a project, so read on and let's get started.
"

Buy it here for $9.99

Tuesday, September 05, 2006

Running Mac OS X on Windows (Short Cuts) Released!

My latest "eBook" - Running Mac OS X on Windows, has just been released by O'Reilly. Here is the synopsis:

"For a long time, a lot of Windows users have been clamoring for the opportunity to run the Mac OS X operating system on their Windows PCs. As Mac OS X was designed to run on a different CPU architecture (PowerPC), running Mac OS X directly on Intel's CPU would not work. It wasn't until recently that PC users saw a ray of hope, when Apple announced that it was moving to Intel's CPU architecture and would hence port Mac OS X to run natively on Intel's x86 CPU architecture. However, the joy was short-lived, as Mac OS X can still run properly only on Apple's customized hardware, not commodity PCs that run Windows. (There are hacks to make Mac OS X run natively on PC hardware, but that is not the legal way to do it).

The only logical means of running Mac OS X on your current PC hardware is to run it in an emulator capable of emulating the PowerPC CPU architecture. While popular virtualization software programs like Virtual PC and VMware have been around in the market for a long time, none support running Mac OS X. Fortunately, an open source project, PearPC, makes it possible to run Mac OS X on Windows. PearPC is an architecture-independent PowerPC platform emulator. (It is released under the General Public License (GPL)-a freely used free software license.) PearPC emulates the PowerPC architecture by using a JIT (Just-in-Time) emulator to dynamically translate PowerPC code into x86 code.

In this Short Cut, you will learn how to install Mac OS X on your Windows PC using PearPC. I will walk you through all the steps needed to successfully get Mac OS X working, as well as configure additional settings to make Mac OS functional."

Buy it here for $7.99.

Monday, August 28, 2006

Create a Location Search Application Using the Microsoft Virtual Earth API

Microsoft's Virtual Earth exposes an API that will let you build map apps easily. Find out how to get started building this application that takes latitude and longitude inputs or does a general location search.

Using Amazon.com’s E-Commerce Web Service

Amazon's E-Commerce service is so popular for good reason. Learn how to build a simple Windows applications that will give you the foundation to do a whole lot more.

Using the Blogger ATOM API

To allow third-party applications to manage your blog, Blogger introduced the Blogger Atom API to allow programmers write applications that interact with Blogger programmatically.

Thursday, August 24, 2006

Execute a Long-Running Workflow Using Persistence in Windows WF

If you're experimenting with workflows it won't be long before you find that you need to run a workflow that is too long to execute directly from memory. A workflow that needs hours-or even days-to conclude requires you to persist the workflow instance to an external medium so that the workflow can be continued later.

Saturday, August 05, 2006

PING))) Ultrasonic Sensor

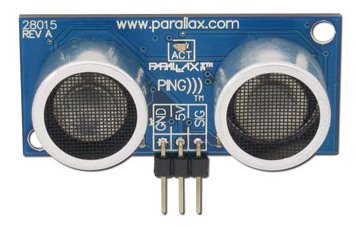
If you want to measure distance in your electronics project, I strongly recommend the PING))) ™ Ultrasonic sensor from Parallax. The PING)))™ sensor measures distance using sonar; an ultrasonic (well above human hearing) pulse is transmitted from the unit and distance-to-target is determined by measuring the time required for the echo return. Output from the PING)))™ sensor is a variable-width pulse that corresponds to the distance to the target.

Say tuned for instructions on how to connect the PING))) sensor to your .NET project! ;-)

Wednesday, August 02, 2006

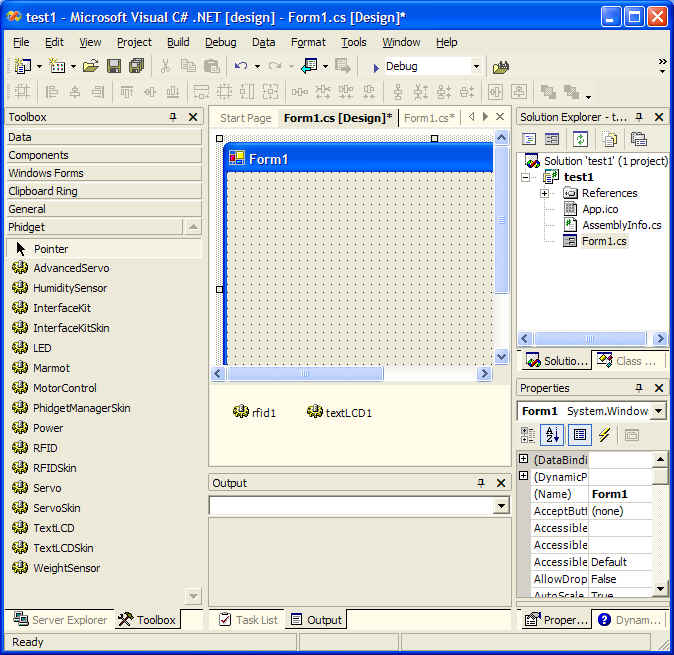
Using Phidgets Components in Visual Studio 2005

If you are using Phidgets parts in your hardware project and want to control them from within .NET, you should download the .NET wrapper for Phidgets from http://grouplab.cpsc.ucalgary.ca/software/Phidgets.NET/PhidgetSetup-alpha.msi. This download will install a set of controls in the ToolBox in VS 2005. You can then drag and drop the controls and use them like all other controls. More info here: http://grouplab.cpsc.ucalgary.ca/software/Phidgets.NET/

Programming Windows Mobile 5.0 Applications Using the .NET Compact Framework

Microsoft has recently launched the Windows Mobile 5.0 platform for Pocket PCs and Smartphones. With the proliferation of Windows Mobile-based devices in the marketplace, companies are gradually mobilizing their enterprising applications to let their staff gain the competitive mobile advantage. Check out my article on Windows Mobile 5 programming in the Sep/Oct issue of CoDe Magazine.

Monday, July 31, 2006

Discover a New Frontier for .NET Development: Program an LCD Display


Personal computers aren't the only place where applications can run. As we look toward the future, the possibilities are limitless for creating applications that manipulate other types of displays. Get started with this sample .NET application that controls an LCD display.

Sunday, July 30, 2006

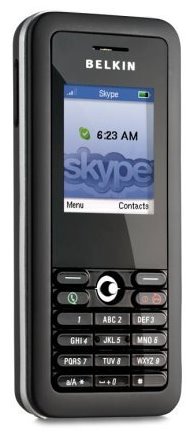
Belkin Wi-Fi Phone for Skype

Amazon.com is now taking pre-orders for the new Belkin Wi-Fi Phone for Skype. At $179.99, it seems to be a good buy. If you are a frequent traveller, this is one good gadget you should carry around, especially use it at airports where you can get free wireless Internet access.

Friday, July 28, 2006

Screencast - Data Binding to Forms Made Simple in .NET 2.0


This is my first attempt at creating a screen cast for TwoMinuteTips.com. The topic is Data binding. Hope you like my voice (still a bit awkward to hear my own voice ;-) )
Anyway, here is the synopsis:

"Data binding is one of the common tasks that developers working with data have to perform. In Windows Forms 2.0, the new BindingNavigator and BindingSource objects can save you a lot of effort in data binding.

This video shows you how to perform data-binding by dragging and dropping data sources onto your Windows Forms. In particular, you will see how you can easily bind your data source to a DataGridView control as well display detailed information of each individual record. "

Keep It Simple - Create a Web-based RSS Reader Using ASP.NET 2.0

My latest article: Keep It Simple - Create a Web-based RSS Reader Using ASP.NET 2.0, was published in the Aug 06 issue of ASP.NET Pro magazine. Using the many new features in ASP.NET 2.0, I demonstrated how to create a Web-based RSS reader.

Note: The online version is only available to subscribers.

Tuesday, July 25, 2006

NOVA : Battle of the X-Planes (2002) DVD

If there is a DVD that I watched many times over and over, it must be the NOVA : Battle of the X-Planes (2002) DVD. I have always been facinated with fighter aircrafts, and this DVD detailed the making of the X-Planes (known as the JSF - Joint Strike Fighter, under development) - from Boeing and Lockheed Martin. From conception to test flights, this DVD has never failed to get me excited, and it always inspired me to write better articles and applications, just like the engineers from Boeing and Lockheed who worked tirelessly to perfect the next generation multirole fighter.

Though this DVD is a bit dated (2002), it still provides great insight into the design philosphopy of the JSF, now formally know as F35 Lightning II.

Saturday, July 22, 2006

ASP.NET 2.0. Zapiski programisty (in Polish)

I just received a copy of my Polish edition of ASP.NET 2.0: A Developer's Notebook. This is quite a surprise to me, and even though I don't understand a single Polish word, I am quite happy to see my work translated into different languages. ;-)

Monday, July 17, 2006

Get Your Code Flowing Faster with Windows WorkFlow Foundation

Activities, decisions, and rules often feel like constraints for human beings, but for applications they are the lifeblood of making things work. Windows Workflow Foundation presents a new programming paradigm that lets these declarative principles guide your coding.

Embedded Computer Running Windows CE 5.0

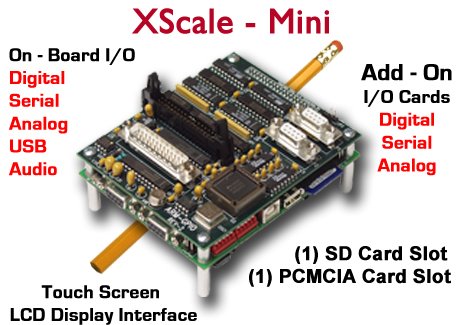
If you are looking for a small embedded computer to control all your cool external electronic gadgets, be sure to check out the XScale-Mini by RLC. It contains an Intel XScale PXA270 RISC processor and comes with a variety of IO ports - USB, RS-232, analog inputs, stereo audio output, etc. More importantly, it runs the Windows CE 5.0 Operating System and comes with .NET Compact Framework 2.0 preinstalled, which means that you can write your applications using the familar VB or C# languages (using Visual Studio 2005). You can connect the XScale-Mini to an external touch-screen LCD and I can think of housing this in my car. Well, there are so many possibilities and I think you will have a lot more ideas. Check out the many boards on RLC's website and find one that suits your purpose. Did I mention that the XScale-Mni cost $749 (without the screen)?

Saturday, July 15, 2006

Adapter board for Parallel LCD displays - the X-board!

As I was looking at the product listing of Matrix Orbital, I stumbled across the X-board S-Series, a serial board that connects to parallel LCD displays! This is a simple but very useful board that allows you to connect your parallel LCD displays to a serial port on your computer. I have a few spare parallel LCD displays lying on my desk right now, and I will definitely going to get the X-board to try out. Finally, I can kiss my soldering iron good bye and focus on programming the LCD (well, not yet...I still have to solder the LCD pins to the X-board...). Sweet! For those concerned about the price, the X-board costs $24.95, which I think is a cool deal.

Parallel LCD Displays

In my previous post I mentioned about the Matrix Orbital Serial LCD display sold by Parallax. In actual fact, most LCD displays that you will encounter are actually parallel devices, not serials. The serial devices are those modified by manufacturers to make them easier to interface with PCs and microcontrollers. The advantage of parallel LCD displays is that they are cheap, with prices ranging from $14 onwards. In fact, I could find parallel LCD displays (without backlight) in my local (Singapore) hardware shop for as low as S$7 (~US$4.30). But the devil is in the details - parallel LCD are more difficult to wire and program. This is especially true in .NET, where there is still no managed classes to do parallel port programming. Nevertheless, if you are willing to pick up a soldering iron, you should be able to wire up a display to the parallel port. Programming it takes a bit of effort, provided you have the necessary APIs to write to parallel port. One good news, though, it that almost all of these displays uses the HD44780 chipset from Hitachi. Hence your application that talks to one LCD should likely work without problem with another LCD from another manufacturer.

Friday, July 14, 2006

Phidget RFID Reader (USB)

Nowadays not all computers have a serial port, and hence if you have a serial device you need to purchase a USB-to-Serial adapter. As I mentioned in my previous post, the Parallax RFID Reader Module uses a serial connection and hence you are out of luck if you do not have a serial port (or do not want to spend the extra money to buy an adapter). Fortunately, you have other choices - the Phidget RFID Reader is one of them. It is a read-only RFID reader that supports USB connections. Instead of reading the tag IDs through the serial port, it comes with an SDK that supports .NET. You just need to use the SDK in your .NET application and service the necessary events to retrieve the scanned tag ID. It comes with a slightly higher price tag, though, a complete kit (contains tags of various sizes) costs $79.25. Check out the kit here.

Special thanks to Matt Trossen and Jennie Jetter from Phidget for assisting me with the RFID reader!

Parallax RFID Reader Module (serial)

If you are interested in RFID and want to experiment with it, I strongly suggest you take a look at Parallax's RFID Reader Module. At $39, it is an affordable way for you to have fun with RFID. It is a read-only RFID Reader that reads tags up to 3 inches proximity. Connection-wise you need a serial cable (you need to convert the TTL interface to RS232 though) and when a tag is detected, it continuously sends the tag ID to your application.

I want to express my gratitude to Ryan Clarke (from Parallax) for his help in getting me started with the RFID reader module. He has been very patient in guiding an hardware-idiot (that's me) and for this I am very grateful to him! Thank you, Ryan!
4x20 Serial LCD with Keypad Interface

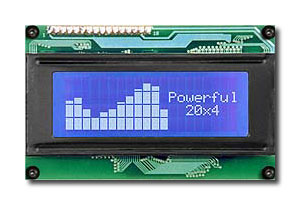
If you want to add some spice to your plain looking computer, you can add an external LCD display. The Parallax's 4x20 Serial LCD with Keypad Interface (manufactured by Matrix Orbital) is one such option. It supports a serial interface which can be connected to your computer serial port and programming it is pretty simple - use serial port programming in .NET and send the necessary commands (as byte arrays) to display strings and special characters. You can also programmatically switch off the backlight as well as adjust the contrast. This is one cool device that you need to have! It comes at a slightly high price, though, at $99.95.

Leverage the Power of the Smart Tag in Your Custom Controls

Learn how to increase your users' productivity by adding Smart Tag support to your custom control.

Creating Windows Starter Kits for Visual Studio 2005

Microsoft has put renewed energy into its Starter Kits for Visual Studio 2005, but did you know you can create your own Starter Kit and export it to .vsi to share with others? Find out how to build a book search Starter Kit using the Amazon Web service.

Saturday, July 08, 2006

Intro to Atlas: The Road to Effortless AJAX Begins Here

There's no reason to get lost with Atlas, Microsoft's framework for building fast, responsive AJAX-enabled Web apps. Get your bearings by following along as we build two introductory applications: a calendar and a content portal.